Introduction
Arduino LED Blink Without Delay: Effortless Blinking Control is a project that allows precise control of LED blinking intervals without using the delay function. By utilizing this approach, the LED can blink at specified intervals while allowing other tasks to be executed concurrently.
Hardware Required
Or you can buy the following sensor kit:
What is Arduino LED Blink Without Delay?
Arduino LED Blink Without Delay: Effortless Blinking Control is an enhanced version of the basic LED blink project. Instead of using delay, this approach utilizes the millis() function to manage time, enabling seamless LED blinking while enabling other processes to occur simultaneously.
How it Works
In this project, we define a specific interval at which the LED blinks using the BLINK_INTERVAL variable. The millis() function helps keep track of the elapsed time since the last LED state change. When the elapsed time matches the defined interval, the LED state toggles, achieving the blinking effect.
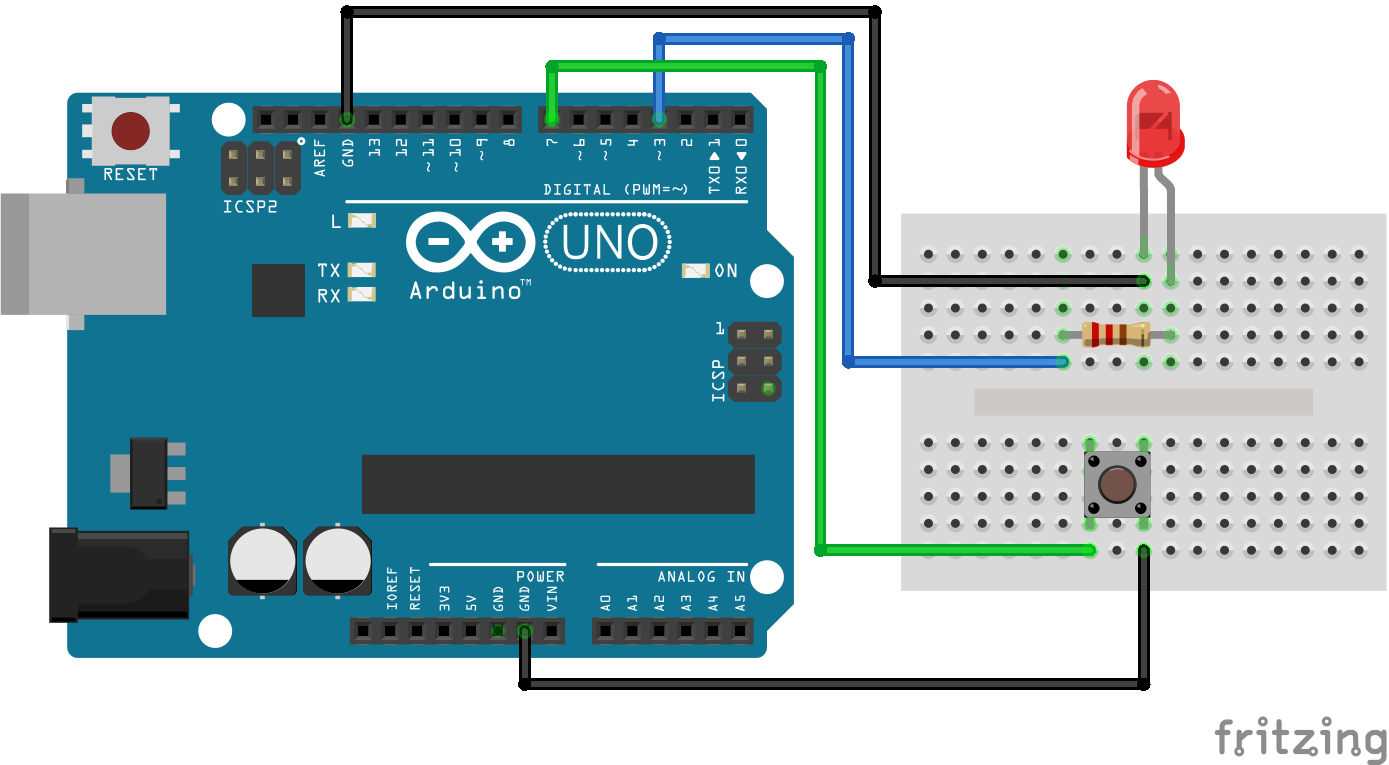
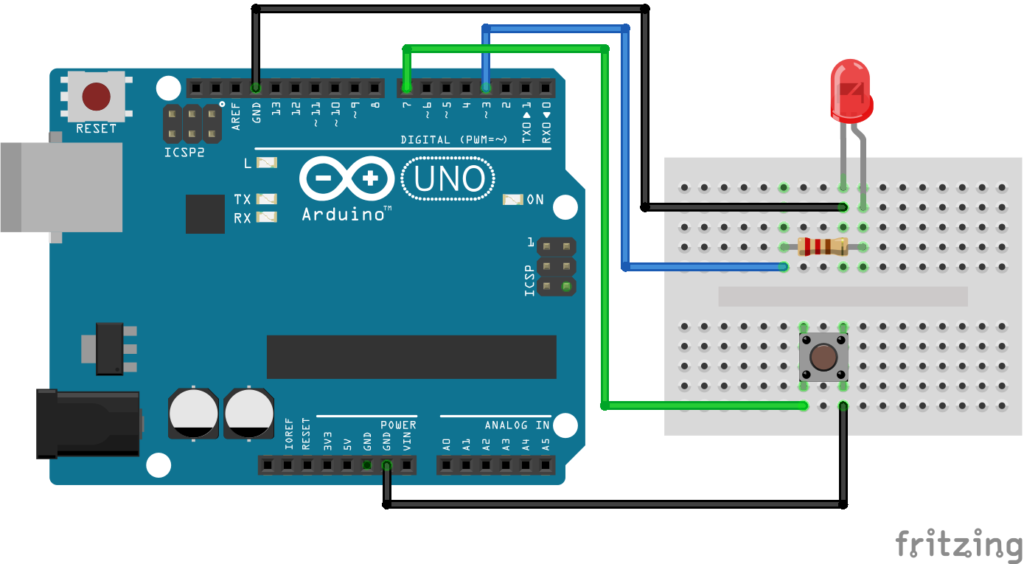
Circuit Diagram
Features of Arduino LED Blink Without Delay
- Precise Timing: Enables accurate control of LED blinking intervals.
- Non-Blocking: Utilizes millis() function for non-blocking code execution, allowing concurrent tasks.
- Enhanced Responsiveness: Immediate detection of button press during the LED blinking cycle.
- Public Domain Code: Example code is provided in the public domain, fostering learning and adaptation.
- Button Integration: Incorporates a button to alter LED blinking behavior, demonstrating interactivity.
- Flexible Hardware Compatibility: Compatible with Arduino UNO and Genuino UNO boards.
How to Program
- Set up the Arduino UNO or Genuino UNO and connect the components according to the hardware requirements.
- Open the Arduino IDE on your computer.
- Copy and paste the provided code into the IDE.
- Upload the code to the Arduino UNO or Genuino UNO board.
- Observe the LED connected to pin 3 blinking at the defined interval, and experiment with the button to alter the behavior.
Code
// constants won't change:
const int LED_PIN = 3;     // the number of the LED pin
const int BUTTON_PIN = 7;  // the number of the button pin

const long BLINK_INTERVAL = 1000;   // interval at which to blink LED (milliseconds)

// Variables will change:
int ledState = LOW;   // ledState used to set the LED

int previousButtonState = LOW; // will store last time button was updated

void setup() {
  Serial.begin(9600);

  // set the digital pin as output:
  pinMode(LED_PIN, OUTPUT);

  // set the digital pin as an input:
  pinMode(BUTTON_PIN, INPUT);
}

void loop() {
  // if the LED is off turn it on and vice-versa:
  ledState = (ledState == LOW) ? HIGH : LOW;

  // set the LED with the ledState of the variable:
  digitalWrite(LED_PIN, ledState);

  delay(BLINK_INTERVAL); // If button is pressed during this time, Arduino CANNOT detect

  int currentButtonState = digitalRead(BUTTON_PIN);

  if(currentButtonState != previousButtonState) {
    // print out the state of the button:
    Serial.println(currentButtonState);

    // save the last state of button
    previousButtonState = currentButtonState;
  }

  // DO OTHER WORKS HERE
}
Application of Arduino LED Blink Without Delay
- Real-time Monitoring Systems: Ideal for systems that require real-time monitoring with concurrent LED indication.
- User-Interactive Devices: Implement in devices where users can control LED behavior through input buttons.
- Traffic Light Control: Efficiently manage traffic light patterns while responding to external triggers.
- Alert Systems: Create responsive alert systems with precise LED blinking intervals based on various triggers.
- Automated Signaling: Implement in automation projects where signaling is required without blocking the system’s other functions.
- Energy-Efficient Devices: Optimize power consumption by controlling LED activity and other processes concurrently.